Hey there, tech enthusiasts! Let’s dive straight into the world of remote access with Raspberry Pi. If you're reading this, chances are you're already knee-deep in the magical realm of IoT, home automation, or just plain old tinkering. Remote SSH Raspberry Pi over Internet is one of those game-changing skills that can open doors to endless possibilities. Imagine controlling your home devices from halfway across the globe or accessing your Raspberry Pi project from your office desk. Sounds cool, right? Well, buckle up because we’re about to break it all down for you.
Before we jump into the nitty-gritty, let’s quickly set the scene. Remote SSH is like giving your Raspberry Pi a virtual handshake from anywhere in the world. It allows you to connect to your Pi via the internet and manage it as if you were sitting right next to it. Whether you're troubleshooting, updating software, or just monitoring your system, SSH is your go-to tool. But here’s the kicker—it’s not as simple as plugging in a cable. There are security concerns, network configurations, and a whole bunch of other stuff to consider.
Don’t worry, though. This guide will walk you through every step, from setting up your Pi to securing your connection. By the end of it, you’ll be a pro at remote SSH Raspberry Pi over internet. So, let’s get started, shall we?
Read also:Omalley Greys The Ultimate Guide To This Fascinating Topic
Table of Contents
- Introduction to SSH and Raspberry Pi
- Setting Up Your Raspberry Pi for SSH
- Port Forwarding: The Gateway to Your Pi
- Dynamic DNS: Keeping Your IP Address Updated
- Securing Your Remote SSH Connection
- Tools and Software You’ll Need
- Common Issues and How to Fix Them
- Alternatives to SSH for Remote Access
- Pro Tips for Efficient SSH Usage
- Wrapping It Up
Introduction to SSH and Raspberry Pi
SSH, or Secure Shell, is like the secret passageway that lets you remotely control your Raspberry Pi. It’s a protocol that allows you to securely connect to your Pi from another computer, anywhere in the world. The beauty of SSH lies in its simplicity and security. Unlike other remote access methods, SSH encrypts all data sent between your computer and Raspberry Pi, keeping prying eyes at bay.
Now, why is this important? Well, imagine this: you’ve set up a home server using your Raspberry Pi. You want to access it from your office or while traveling. Without SSH, you’d have to physically connect to your Pi, which is obviously not ideal. SSH eliminates this hassle, letting you manage your Pi from anywhere, as long as you have an internet connection.
Why Choose Raspberry Pi for Remote SSH?
Raspberry Pi is a powerhouse when it comes to IoT projects. It’s affordable, versatile, and has a massive community backing it up. Plus, it’s tiny, making it perfect for portable projects. Here are a few reasons why Raspberry Pi is ideal for remote SSH:
- Low power consumption
- Compact size
- Strong community support
- Pre-installed SSH capabilities
Setting Up Your Raspberry Pi for SSH
Alright, now that you know why SSH is awesome, let’s get your Raspberry Pi ready for remote access. The first step is enabling SSH on your Pi. Don’t worry, it’s super easy. Just follow these steps:
- Boot up your Raspberry Pi with the latest version of Raspberry Pi OS.
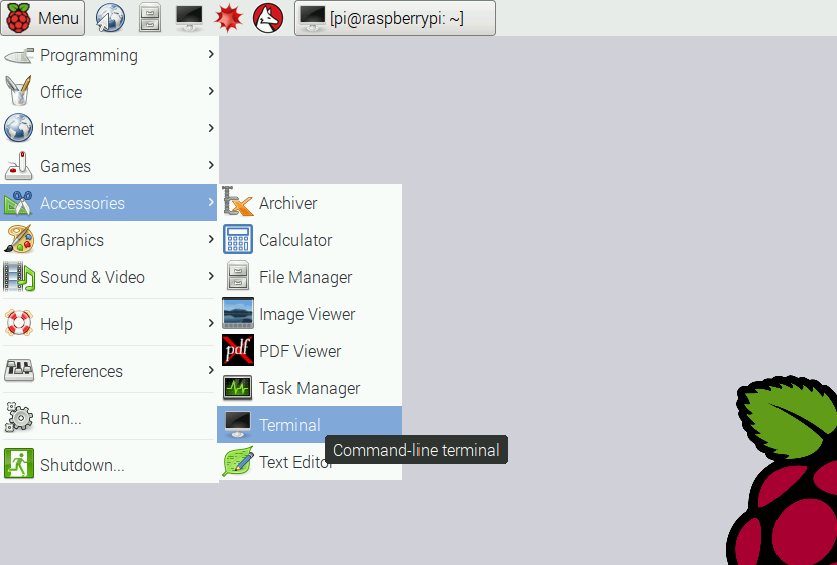
- Open the terminal or go to the Raspberry Pi Configuration tool.
- Navigate to the Interfaces tab and enable SSH.
- Reboot your Pi to apply the changes.
That’s it! Your Pi is now ready to accept SSH connections. But hold your horses, we’re not done yet. To access your Pi from the internet, you’ll need to do a few more things. Let’s move on to the next step.
Checking Your Pi’s IP Address
Before you can connect to your Pi remotely, you need to know its local IP address. You can find this by typing the following command in the terminal:
Read also:Does Mike Delfino Die The Truth Behind His Story On Desperate Housewives
ifconfig
This will display a bunch of information, but what you’re looking for is the IP address under the wlan0 or eth0 section. Jot it down, you’ll need it later.
Port Forwarding: The Gateway to Your Pi
Okay, here’s where things get a little tricky. To access your Pi from the internet, you need to set up port forwarding on your router. Think of it like setting up a mailbox for your Pi. When someone sends a letter (or in this case, an SSH request), it gets delivered directly to your Pi.
Here’s how you do it:
- Log in to your router’s admin page. This is usually done by typing 192.168.0.1 or 192.168.1.1 in your browser.
- Find the port forwarding section. It might be under Advanced Settings or NAT.
- Create a new rule, specifying the following:
- Service Name: SSH
- External Port: 22
- Internal IP Address: Your Pi’s local IP address
- Internal Port: 22
- Save the changes and restart your router.
Boom! Your Pi is now accessible from the internet. But wait, there’s one more thing you need to do to make sure everything works smoothly.
Troubleshooting Port Forwarding
Sometimes, port forwarding can be a bit finicky. If you’re having trouble, here are a few tips:
- Make sure your Pi’s IP address is static. You can set this in your router’s DHCP settings.
- Check if your ISP blocks port 22. If they do, try using a different port number.
- Test your setup using an online port checker tool.
Dynamic DNS: Keeping Your IP Address Updated
Now, here’s the thing. Your internet connection might have a dynamic IP address, meaning it changes every now and then. This can be a problem when trying to connect to your Pi remotely. Enter Dynamic DNS (DDNS). DDNS services keep track of your IP address and update it automatically, so you always know where to find your Pi.
Here’s how to set it up:
- Sign up for a DDNS service like No-IP or DuckDNS.
- Follow their instructions to create a hostname for your Pi.
- Install the DDNS client on your Pi. This will update your hostname whenever your IP address changes.
With DDNS in place, you can now connect to your Pi using a simple hostname instead of worrying about IP addresses. Pretty neat, huh?
Popular DDNS Services
There are tons of DDNS services out there, but here are a few popular ones:
- No-IP
- DuckDNS
- Cloudflare
Securing Your Remote SSH Connection
Security is key when it comes to remote SSH. After all, you don’t want some random hacker gaining access to your Pi. Here are a few tips to keep your connection safe:
- Change the default SSH port from 22 to something less obvious.
- Use strong passwords or, better yet, SSH keys for authentication.
- Limit access to specific IP addresses using firewall rules.
- Regularly update your Raspberry Pi OS to patch any security vulnerabilities.
By following these steps, you can rest easy knowing your Pi is safe from prying eyes.
Using SSH Keys for Authentication
SSH keys are like digital IDs that let you log in without a password. Here’s how to set them up:
- Generate a key pair on your local machine using the command: ssh-keygen
- Copy the public key to your Pi using the command: ssh-copy-id pi@your-pi-hostname
- Test the connection by logging in without a password.
SSH keys are way more secure than passwords, so it’s definitely worth the effort.
Tools and Software You’ll Need
Now that you’ve got the basics down, here are a few tools and software that’ll make your life easier:
- Putty: A popular SSH client for Windows.
- Terminal: Built-in SSH client for macOS and Linux.
- WinSCP: A great tool for transferring files over SSH.
- DDNS Clients: For keeping your hostname updated.
With these tools in your arsenal, you’ll be able to manage your Pi like a pro.
Common Issues and How to Fix Them
Even the best-laid plans can go awry sometimes. Here are a few common issues you might encounter and how to fix them:
- Connection Refused: Double-check your port forwarding settings and make sure SSH is enabled on your Pi.
- Timeout Errors: Test your connection using a port checker tool and ensure your Pi’s IP address is correct.
- Authentication Failed: Make sure you’re using the right username and password, or check your SSH keys.
Don’t sweat it if things don’t work the first time. Troubleshooting is half the fun of tinkering with tech!
Alternatives to SSH for Remote Access
SSH isn’t the only game in town when it comes to remote access. Here are a few alternatives you might want to consider:
- VNC: Allows you to access your Pi’s graphical interface remotely.
- TeamViewer: A user-friendly option for remote access and file transfer.
- Webmin: A web-based interface for managing your Pi.
Each of these has its own pros and cons, so choose the one that best fits your needs.
Pro Tips for Efficient SSH Usage
Here are a few pro tips to help you make the most of SSH:
- Use aliases in your SSH config file to simplify connections.
- Set up a cron job to automatically update your DDNS hostname.
- Regularly monitor your Pi’s logs for any suspicious activity.
These tips will save you time and effort in the long run, so it’s worth taking a few minutes to set them up.
Wrapping It Up
And there you have it, folks! A comprehensive guide to mastering remote SSH Raspberry Pi over internet. From setting up your Pi to securing your connection, we’ve covered everything you need to know. Remember, practice makes perfect, so don’t be afraid to experiment and learn as you go.
Now, here’s your call to action: try setting up SSH on your Raspberry Pi and see how it works for you. Leave a comment below letting us know how it went, or share this article with your tech-savvy friends. And if you’re hungry for more, check out our other guides on all things Raspberry Pi.
Until next time, keep tinkering and stay awesome!